
This post could also be titled: “How one weekend turned into three”, and is all about how we made a project a lot more complicated than it had to be. But the great news is now we don’t have to worry about any precious cargo falling off the boat!
We knew when we bought our boat that lifeline netting was a must. It basically turns your boat into a giant playpen and gives an extra level of security if you have pets or children aboard (though they should always be supervised while on deck regardless, even at the dock). It doesn’t look pretty, but it is functional.
We asked one of our neighbors how long it took to put up his netting, and he told us 22 hours. We naively thought that he was exaggerating. Nope. Turns out, this project is meticulous, time consuming, and an all-around pain in the butt, especially outside in the summer heat. So we thought we’d do it a different way, and ended up paying the price. Lesson learned: never try to take a shortcut.
We bought two packages of 50ft lifeline netting ($50 ea) and dacron line for securing the bottom of the net to the boat. For the top of the net, we had the genius idea of using zip ties instead of running line through the diamonds, which would have kept everything much neater and less tangled. We ran the first 50ft section from gate to gate, around the bow of the boat (and had some to spare). Here’s what we ended up with the first weekend:

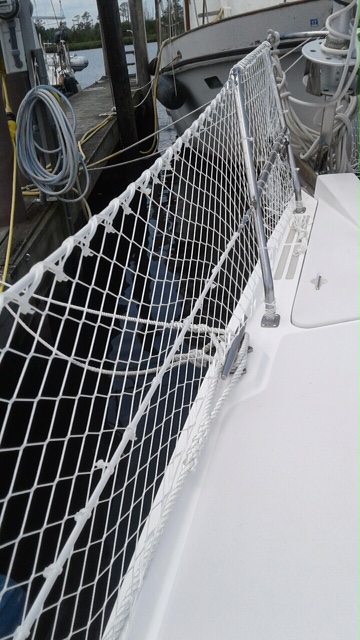
The zip ties were helpful in holding everything in place while we measured out the netting and secured the bottom, but we shouldn’t have assumed they would hold forever. We used white zip ties, which we soon found out had about a three month shelf life outside, because the UV rays from the sun would break them down. Talk about a safety issue! So we had to run the line through the top AFTER everything was already secured to the stanchions. Then once the line was through, we had to go back and snip off every single zip tie (without accidentally cutting the net!). We also ran another line through the middle of the net for extra security. That was weekend #2. Here’s what it looked like:
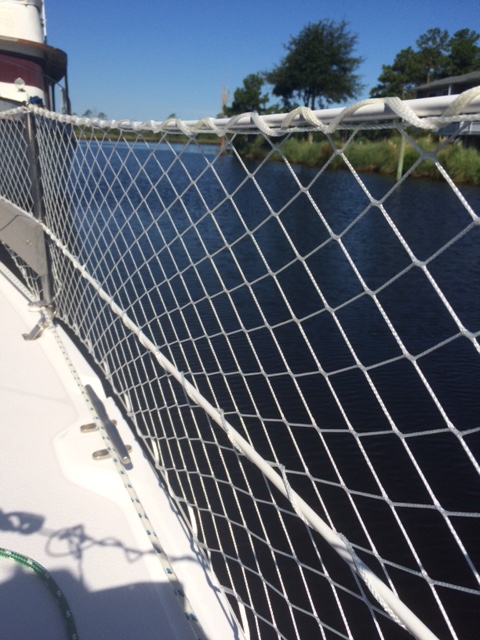
Weekend #3 (this past weekend) Conor finally finished the stern of the boat. Our second 50ft piece wrapped around the back, and was trickier because of the extreme height changes and the catbird seats. Instead of stretching the net horizontally, it needed to be stretched vertically. He also had to figure out a way to tie the bottom of the net to the gates, while still making them easy to open. The solution: carabiners! He tied a loop knot at the bottom of the dacron line at the gates and hooked them to a carabiner to be easily slipped on and off when we unlocked the gate. Like this:


This is the lifeline netting wrapped around the catbird seat:

Oh, and we also found out that you should replace your lifeline netting every two years. We’re vowing to do this right the first time around in 2019! At least we learned from our mistakes. If you’re putting up your own netting, feel free to ask us a question!
Love,
Taylor and Conor


Looks great Tay, albeit a big PITA. Doesn’t seem that you like the look but I do – sort of adventure-y.
________________________________
LikeLiked by 1 person
Thanks! It will help make sure you don’t fall overboard when you come visit 🙂
LikeLike